Recipes – by ATTN Agency Collaborator
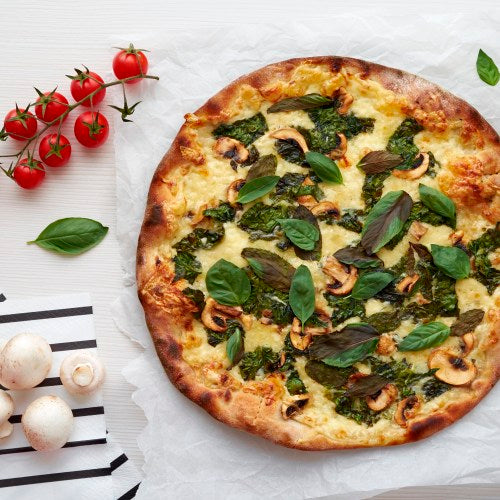
No-Knead Spinach, Mushroom, and Basil Pizza
Only a few things can quite compare to the magic of homemade pizza. While the act of making your own pizza crust might seem a bit intimidating, this no-knead dough is full-proof and takes barely any effort – the dough just needs time to rise and to develop the gluten. We’re topping our pizza with tasty mushrooms, sweet baby spinach, fragrant basil, and gooey mozzarella cheese.
No-Knead Spinach, Mushroom, and Basil Pizza:
Prep time: 8-12 hoursCook time: 15 minutesServes: 4
Ingredients:
– 4 cups all-purpose flour, plus more for dusting the dough
– ¼ teaspoon dry active yeast
– 1 ½ teaspoons salt
– 1 ½ cups water
– 4 tablespoons extra-virgin olive oil, plus more for greasing the pan
– 4 garlic cloves, minced
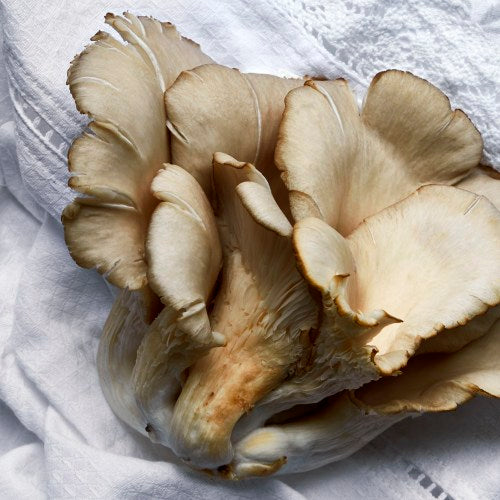
– 4 cups mushrooms of choice, thinly sliced (we like oyster or shitake, but any will do)
– 4 cups baby spinach
– 4 cups mozzarella cheese, freshly grated
– 2 oz. parmesan cheese, freshly grated
– 1 bunch fresh basil
Directions:
In a large mixing bowl, combine the flour, yeast, and salt. Pour over the water and using a wooden spoon, mix thoroughly.
Tightly wrap the bowl with plastic wrap and place a kitchen towel on top of the plastic wrap. Place the bowl in a warm spot and let the dough rise until doubled in size, at least 8 hours or up to 12 hours.
Preheat your oven to 450 degrees F and lightly grease a baking dish with a bit of olive oil.
Flour your working surface and scrape out the dough. Divide the dough into 4 equal parts to make 4 individual pizza bases.
Flour your hands and gently work and stretch each pizza ball dough into a pizza base. It doesn’t have to be precise or a perfect circle – it will still taste amazing. Transfer the pizza crust onto the prepared baking sheet.
In a small bowl, whisk together the olive oil with the minced garlic and brush each pizza crust with a tablespoon of the garlic olive oil.
Top with ¼ of the mushrooms and spinach, followed by a ¼ of the mozzarella. Finally, sprinkle a ¼ of the parmesan on top.
Transfer the pizza into the oven and bake until the crust is golden-brown on the bottom and around the edges and the cheese is all melty and gooey, around 10-15 minutes. Remove the pizza from the oven and immediately top with fresh basil leaves. Slice and enjoy!